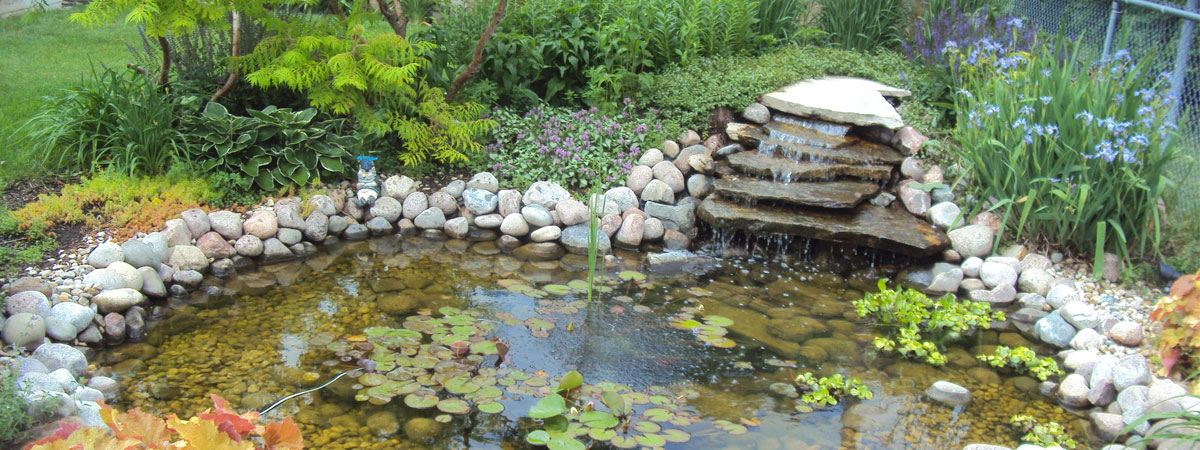
 Adding a water garden or pond to your landscape will transform your yard into an oasis with the tranquil sounds of a waterfall. Adding fish and watching them grow is also a fun way to enjoy your pond.
Bylaws & Safety
Before you consider installing a pond or any type of water feature, we recommend you consult with your municipality’s Zoning Department. They can go over any water depth restrictions, fencing requirements or building permit requirements for your area. Bylaws differ from city to city and may even be different from one block to the next.
Before getting the tools out, you should make a few more inquiries. Think of underground services like sewers, gas and power lines, cable TV, telephone, etc. Be safe and call before you dig. Don’t forget to notify your insurance company.
If you plan to operate electrical equipment in your pond, such as a fountain pump or underwater lighting, make sure you use approved equipment only (UL Listed) and connect it to a properly grounded and GFCI (Ground Fault Circuit Interrupter) protected outlet only. Do not run extension cords across your lawn. Not only are they not approved for use around the pond, they may get chewed up by your lawn mower and you risk being electrocuted.
Tools Required
Carefully read all instructions supplied before operating any equipment. Always follow the manufacturer’s recommendations and guidelines.
Tools Required
Now that you have found the perfect location for your new pond you can start gathering some tools. You will need:
- Rope or can of spray paint (to outline the shape of your pond)
- Wheelbarrow
- Shovel
- Pick Axe (if you have clay in your yard)
- Flexible measuring tape
- A level
- Straight board or 2x4 long enough to reach across the pond
- A few friends who would love to spend their weekend digging a hole in your yard
1. Decide what type of pond you want to build
- Consider what type of aquatic life you want in the pond.
- Do you plan to have fish?
- Or is it for the aquatic plants?
- Maybe you only want the pond for the sound of a waterfall.
Proper planning for the specific features you want included is important. Keep in mind that the most common mistake water gardeners say they made when building their first pond was making it too small. A small pond limits the number of fish and plants you can add.
Koi Pond
- A koi pond is different from a water garden because koi limit the amount of plant life available to be grown. This is due to koi eating the plant material in the pond.
- A koi pond should large because koi get large despite the size of the pond. The recommendation is that a koi pond be no less than 1000 gallons in volume. It also needs to have an area of the pond at least 3 feet deep, this is to allow the fish to go to the bottom of the pond in the winter when the pond freezes.
Water Garden
- A water garden generally contains just plants or a few goldfish and maybe a waterfall. Water gardens still require an area in the pond to be at least 3 feet deep, again for the fish to be able to survive the winter. (Tip: Even if initially you don’t plan on adding fish you should create an area that is 3 feet so it is easier when and if you decide to add fish later on.)
2. Select the area you would like the pond to go
- You will most likely enjoy the pond more if it is installed close to the home.
- Select an area where you can see the pond year round. Ponds will attract wildlife like birds and butterflies especially if you incorporate shrubs and perennials on the exterior of the pond.
- Place the pond where runoff from rain will not flow into the pond. This is dangerous because it could carry fertilizers and pesticides in it and intern kill or harm the fish or plants.
- It is best if the pond receives at least 4-6 hours if you plan on having flowering water plants in the pond as well as fish.
3. Determine the size you desire
- The best way to do this is to use a rope or water hose and lay out the shape on the ground.
- Keep in mind that there should be an area that is 3 feet to accommodate fish in the future.
- The mistake that most people make is building the pond too small. The larger the pond the easier to maintain. Remember that a finished pond will be about 30% smaller than you visualize it.
- After laying out the shape, measure the maximum length and width. Add twice the depth to the length and width measurements, plus two feet for overlap and this will give you the pond liner size. (Example: A finished pond being 10 wide by 15 feet long at 2 feet deep would require a liner size of 15 feet by 20 feet.)
4. Dig the pond or water garden to the desired shape
- Be sure to dig a shelf around the perimeter of the pond about one foot deep and one or more feet wide this should be your plant shelf.
- Dig the rest of the pond with a slight slope to the opposite end that the waterfall is located if one is included in the design.

5. Place any external pond filters and/or pond skimmers and level these in their location.
- Pond skimmers should be buried to the proper level beside the pond. Follow the manufacturer’s directions for depth.
- Be sure to dig a trench for the tubing to be buried, not too deep just incase you need to fix or replace in the future.
- The tubing should go from the pump to the waterfall box.
- If you have a clarifier or sterilizer it is recommended to have a separate pump that goes to the clarifier or sterilizer then either back into the pond or into the waterfall box.

6. Line your pond with Underliner
- This is to help with reducing and eliminating tears in the liner itself.
- You may want to tape any small pieces together to keep them from moving when the pond liner is placed.
- We carry Firestone PondGard Rubber Lining, click here to learn more, then buy online today!
7. Place in the rubber liner and unfold
- Position the liner evenly in the pond. Minimize folds and wrinkles but some will be needed. After adding water the folds will decrease and should work themselves out.
8. The areas you plan to use as waterfalls or streams can now be excavated
- A waterfall box can be placed to establish the first waterfall. If you desire the waterfall to spill directly into the pond then use the liner to go up the side of the waterfall box until stones can be used to hold it in place.
- If a small pool or stream is preferred then dig these 6-7 inches deep and to the desired size and shape.
- Arrange the underliner and pond liner; be sure to allow for several inches to overlap into the pond.
- Tubing from the pump can be used in the stream or pool or if you have a waterfall box it can be brought to that.
- Dig the stream wider then the finished size to allow for stones to be placed along the sides to both help hold the liner and to hide the liner.
- Stone can be secured to the liner with mortar or foam. This will hold back the water allowing it to spill over the stone creating the waterfall.

9. Place stone around the edge of the pond
- Arrange the stone around the edge of the pond and fold the pond liner up behind the stone to slightly above the water level.
- Back fill with soil to hold the pond liner against the stone.
- Fill the pond with water to within a few inches from the top and then make corrections if necessary to make certain that the pond is level.
- As the pond is filling get rid of wrinkles and create folds as needed.
- Be sure to check out our supply of natural stone slabs and natural stone steppers for your pond.
10. If you know the tap water has chlorine in it add some dechlorinator to remove the contaminants
11. Additions
- Add aquatic plants as soon as possible after constructing the pond.
- Fish should be added a few at a time over several weeks to allow the bacteria to establish.
- Add water lilies and other plants with surface leaves such as hyacinths to provide shade to roughly 66% of the surface area if in full sun. This will help suppress the growth of algae in your pond.
12. Finally, sit back in a lounge chair with a beverage and some music playing and enjoy the sites and sounds of your masterpiece water feature!


